Using K-Means Clustering to Create a Color Palette from Reference Images
- Billy @ Generative Labs

- Jan 13, 2023
- 5 min read
Updated: Jul 10, 2023
Exploring How to Generate Beautiful Color Combinations Using Unsupervised Machine Learning in Python

TLDR: Color palettes are an important part of any design project. This post explains how machine learning algorithms can be used to create color palettes 🎨 from reference images 🌇
A color palette is one of the most important and fundamental parts of any design project. It sets the mood for the entire look and feel, and provides guidance and direction for the rest of the design. This post looks at how the k-means machine learning algorithm can be used to create color palettes from reference images
Aspiring generative arist? Join our mailing list
Machine Learning Classifiers
A machine learning classifier is an algorithm that takes data as input and looks for relationships between data points and groups similar items together.
There are a number of types of classification algorithms, but they come in two flavors:
Supervised classification - It is able to “learn” from data that has already been labeled and it uses that information to classify new data it hasn't seen before
Unsupervised classification - It is able to classify data without requiring any sort of training data in advance
K-means Clustering Algorithm
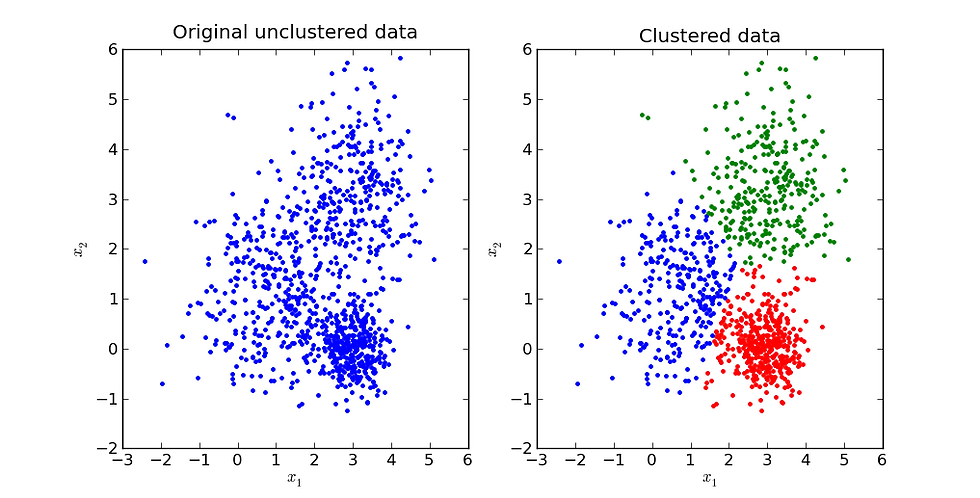
The K-means clustering algorithm is a specific unsupervised machine learning algorithm used for data segmentation. Given a set of data points (see image on the left), the k-means algorithm segments it into three groups based on each points proximity to the center of the cluster (image on the right).
Why does this matter?
This clustering methods allow you to group entities together, and is extremely useful in practice, so there are many applications where it's used:
Anomaly detection: In banking, it's used to classify transactions as either fraudulent or valid
Customer segmentation: In business, grouping customers into similar categories based on demographics or behaviors
Document clustering: It is used to classify documents to automatically organize documents in a repository
K-means for Color Palette Generation
The first step in creating an color palette from a reference image is to utilize a library like OpenCV to read it into a structure and extract its color information. This allows us to access each pixel's RGB values.
Loading the Image
In Python:
# Load image and display
img_original = cv2.imread(image_path)
print('Dimensions : ',img_original.shape)
print(img)
Outputs:
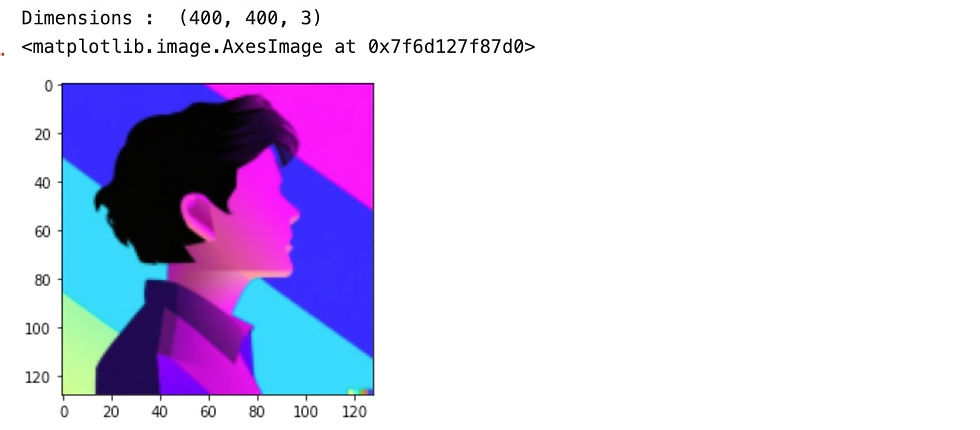
Looking at the output above, you can see it's a 3D array. OpenCV stores images in a 2D array of pixels, with each pixel being represented by a 1D array of RGB values. Here are the first few rows of pixels:
Dimensions :  (400, 400, 3)
[[[252  43  57]
  [252  43  57]
  [253  43  57]
  ...
  [250   3 251]
  [249   3 251]
  [249   2 252]]

 [[252  43  57]
  [252  43  57]
  [253  43  57]
  ...
  [250   3 251]
  [249   3 251]
  [249   2 252]]

 [[252  43  57]
  [252  43  57]
  [253  43  57]
  ...
  [251   4 252]
  [250   3 251]
  [249   3 252]]
Data Preprocessing
The next step is to get the data into the correct format as expected by the k-means library. Rather than a matrix of RGB values in a 2D array, we need a simple list of RGB values. We'll do a simple transformation, then load the result into a Pandas data frame.
# Normalize pixels from X,Y grid of RGB values --> list of RGB values
pixels = []
for row in img:
     for pixel in row:
         pixels.append(pixel.tolist())

# Create a dataframe of RGB values
df = pd.DataFrame(pixels, columns = ['B', 'G', 'R'])
Output:
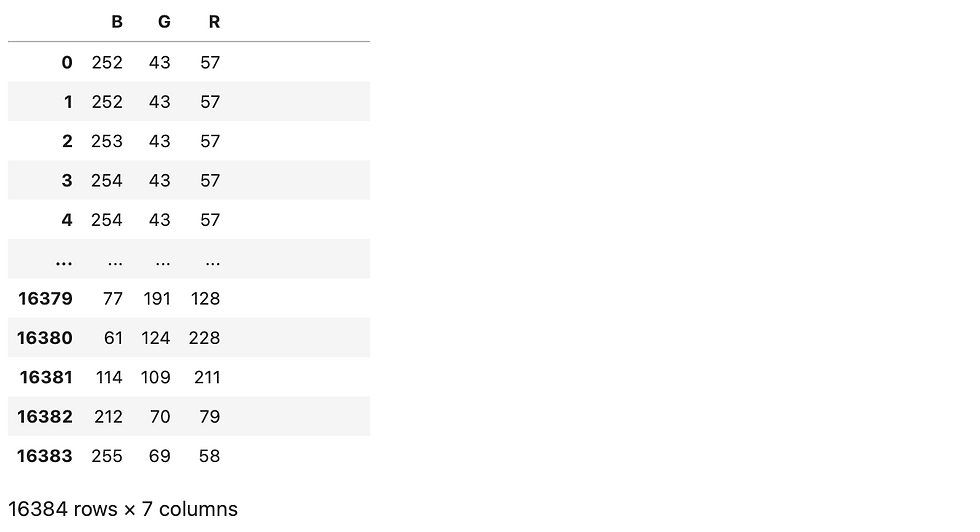
If you look at the data above carefully, you'll notice OpenCV actually stores data in BGR (versus RGB) format. With that, we're ready to cluster.
Clustering using K-means
Next step in the process is to use Scikit Learn's KMeans method. We'll pass in the number of clusters we want generated. For our purposes, the number of clusters dictates the number of colors in our color palette.
Here we chose 5.
from sklearn.cluster import KMeans

# Compute kmeans
X = df.iloc[:,0:3].values
km = KMeans(n_clusters = 5, init = 'k-means++')
y = km.fit_predict(X)
With that, the KMeans method creates 5 clusters and places each pixel into its most appropriate cluster. Each cluster is given a label of 0 thru 4.
We then add the classifications to the data frame.
# Add classification column to dataframe
df['cluster'] = y

df
Outputs:
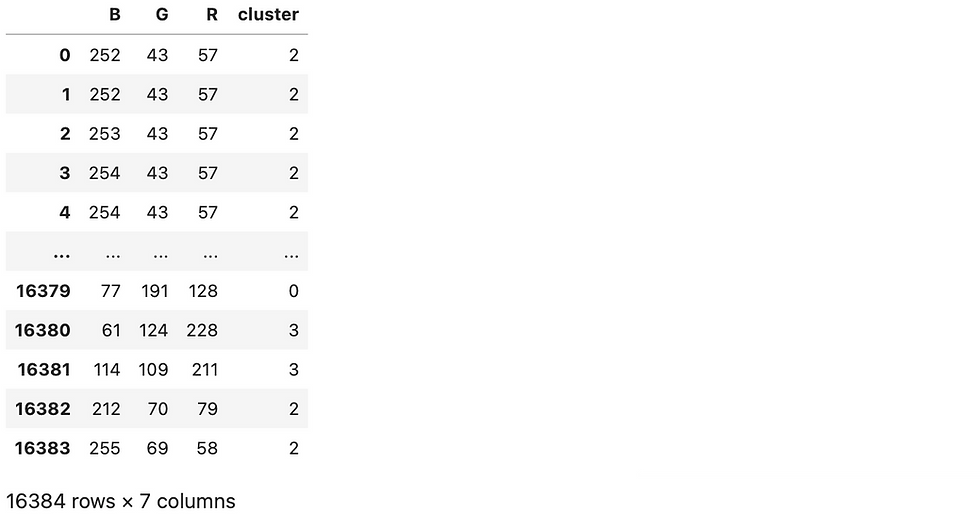
Our pixels have been clustered! 💣💥
Selecting the Cluster Colors
Each one of these clusters represents a group of colors that are similar. One way to select the "representative" color for each cluster is to look at the clusters' "centroids." The centroid is the center point of the cluster.
Because our centroid exists at the center of a 3d plane, we can use the centroid's X Y Z coordinates as our R G B values. You can access the centroid of each cluster using the cluster_centers_ property.
centroids = km.cluster_centers_.tolist()
centroids
Output:

In the output above, you can see there is a 2D array of 5 points in 3D space. One point for each of our 5 clusters. Each represents an X Y Z value of the centroid. We'll use the X Y Z as our R G B values.
Prepping for Visualization
To plot the results, we need to do a little more data processing. Unfortunately the plotting library we'll use doesn't represent colors as RGB values ranging from 0-255. Instead, it expects values ranging from 0-1. So we'll need to process the centroid data set further to get it to the expected format.
# Map 0-255 → 0-1 for display
centroids = km.cluster_centers_.tolist()
for centroid in centroids:
    (X, Y, Z) = centroid[0], centroid[1], centroid[2]
    centroid[0] = X/255
    centroid[1] = Y/255
    centroid[2] = Z/255

centroids
Output:

That looks good! 👏
Almost there. Last thing before seeing the results, we need to assign each row in the original data frame the appropriate color as defined by the centroid of the cluster.
# For each cluster, add a column to its dataframe representing its centroid color
for i in range(number_of_clusters):
    df.loc[df['cluster']==i, 'R_centroid'] = centroids[i][0]
    df.loc[df['cluster']==i, 'G_centroid'] = centroids[i][1]
    df.loc[df['cluster']==i, 'B_centroid'] = centroids[i][2]

df
Output:
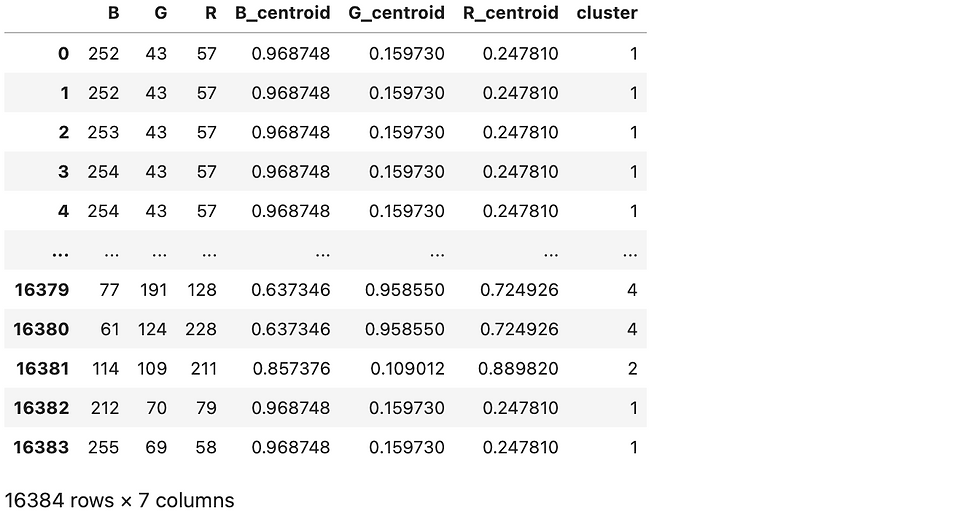
There we go! You can see each pixel is assigned a cluster, and each individual cluster shares a common centroid, representing an RGB value.
Visualizing the Results
We've got everything we need to visualize our results. The following code calls plot.scatter3D for each cluster. scatter3D takes the coordinates, then the cluster_color.
import matplotlib.pyplot as plt

kplot = plt.axes(projection='3d')
xline = np.linspace(0, 15, 1000)
yline = np.linspace(0, 15, 1000)
zline = np.linspace(0, 15, 1000)
kplot.plot3D(xline, yline, zline, 'black')

for i in range(number_of_clusters):
    cluster = df[df.cluster==i]
    cluster_color = cluster[["R_centroid", "G_centroid", "B_centroid"]].values.tolist()
    kplot.scatter3D(cluster.R, cluster.G, cluster.B, facecolors=cluster_color)

plt.axis('on')
plt.show()
Output:
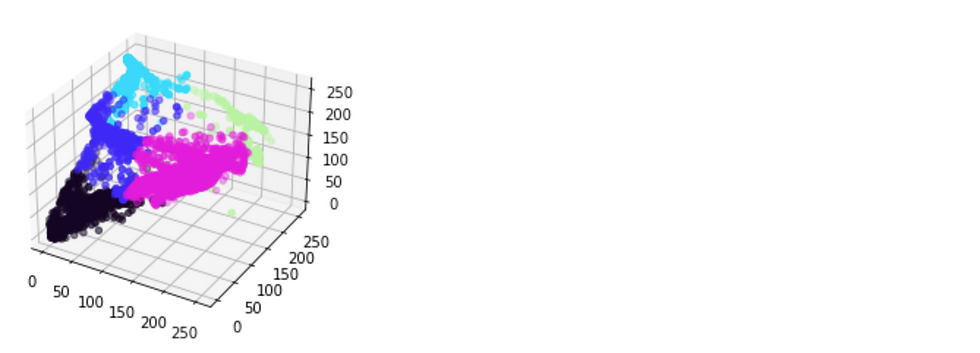
Tada!! 🎉🎉🎉
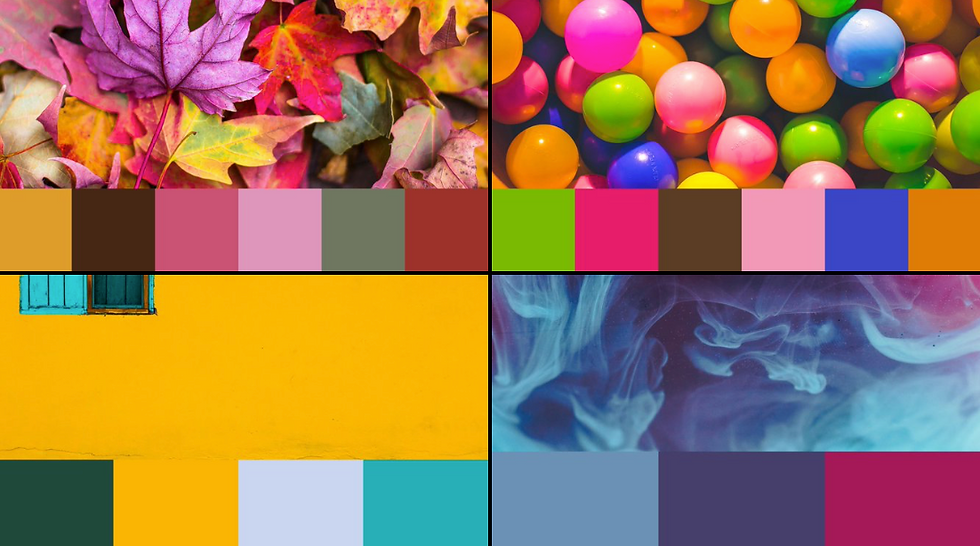
Our first visual glimpse of the colors pulled from the image. Putting the selected colors adjacent to the original image, we have:

Not bad!
Well, that's it! We've gone through the basics of how to create color palettes from images using machine learning. With the right tools and techniques, you can use this powerful technology to create stunning visuals for your projects. So there you have it: the perfect way to get creative with your color palettes.
Have fun!
Aspiring generative arist? Join our mailing list


Comments